Unlimited Residential Proxies Quick Start Guide
Unlimited Residential Proxies
Quick Start Guide
Quick Start Guide
Unlimited Proxy Servers provides unlimited traffic, giving you the freedom to transfer data without
restrictions. This ensures seamless access without worrying about data usage limits.
In this guide, you can learn more about how to use Blurpath Unlimited residential proxies.
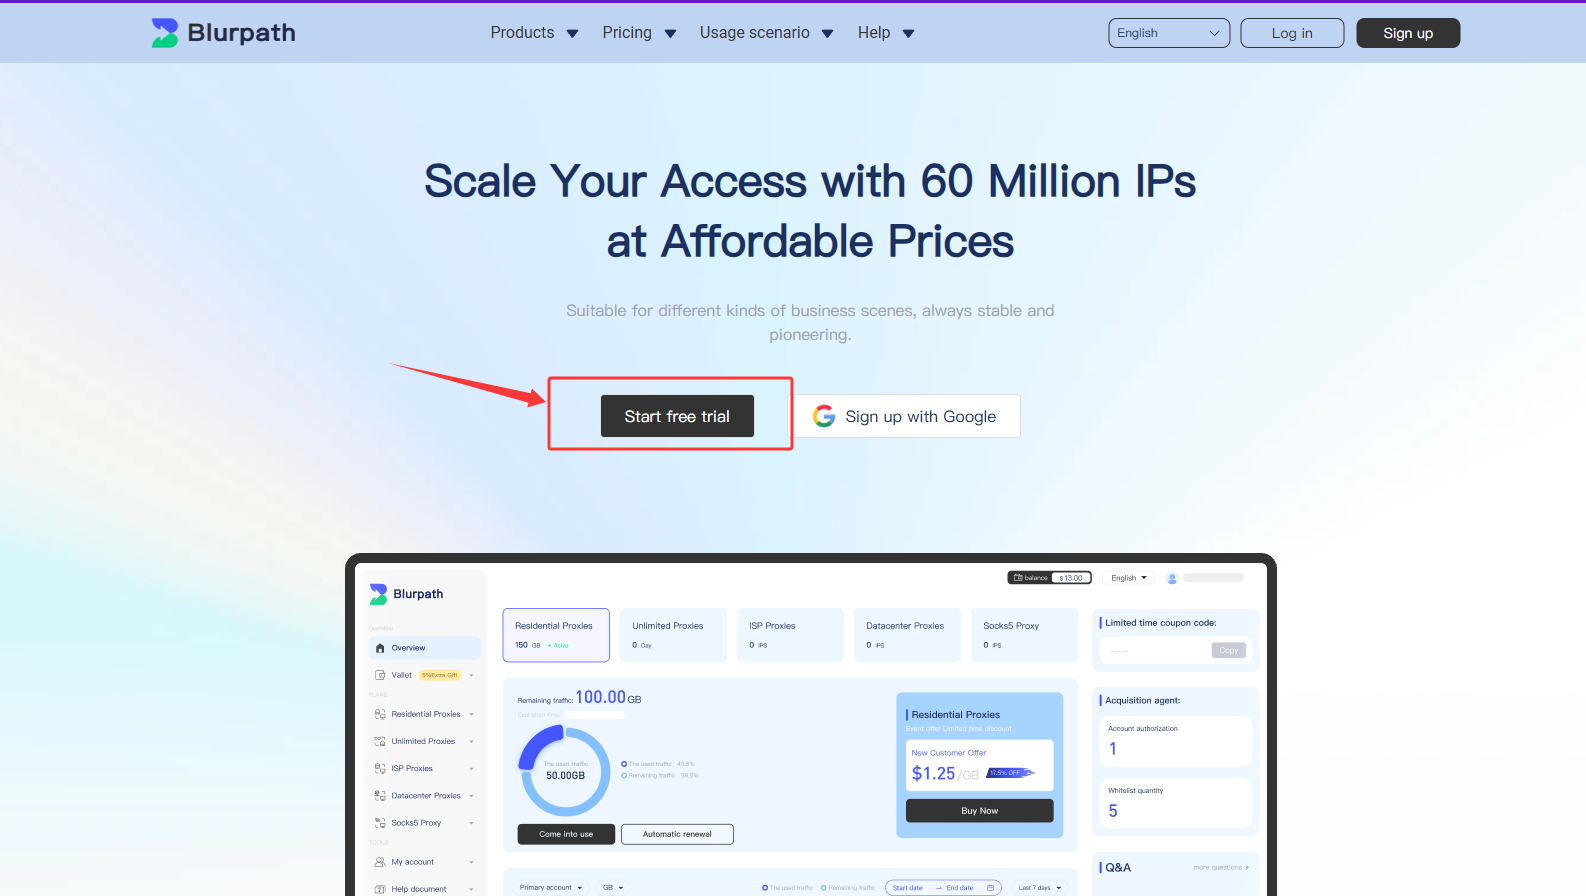
Before you start using Blurpath residential proxies, register an account first.
Visit the official website homepage and click [Start free trial] to sign up.
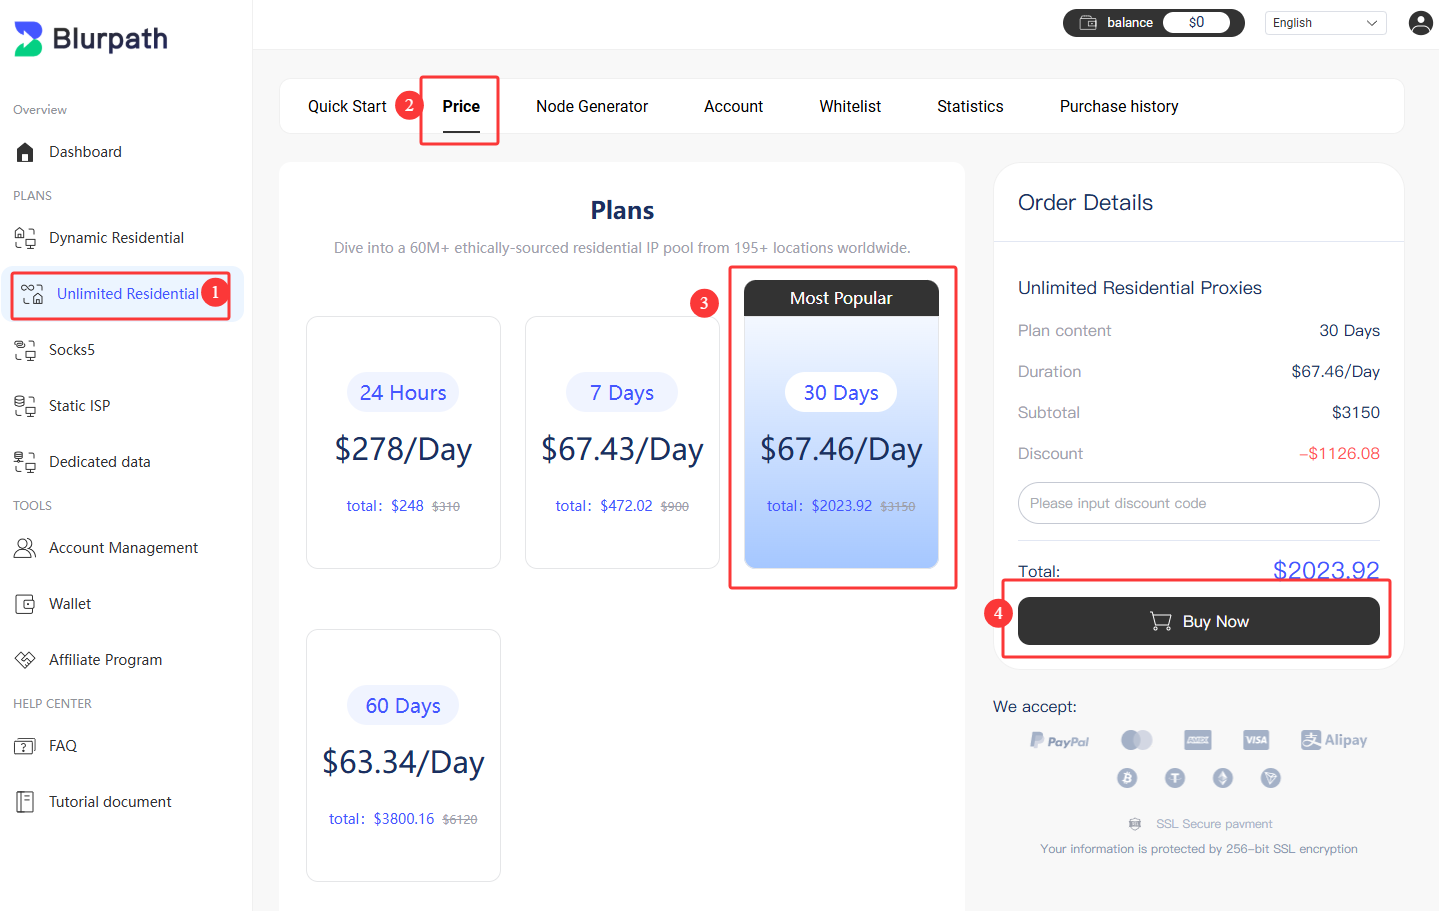
After completing your account registration, select the residential proxy package you wish to purchase from
your dashboard.
- From the left-hand menu, select unlimited Residential
- Then click [Price] to open the unlimited residential proxy package purchase interface.
- On the package purchase page, select the type of package you want to buy, then click the [Buy Now] button to proceed to the payment process.
- On the payment screen, select your preferred payment method
- Click the payment button to complete the transaction.
Tips: If you have a coupon code, enter it in the coupon code field.
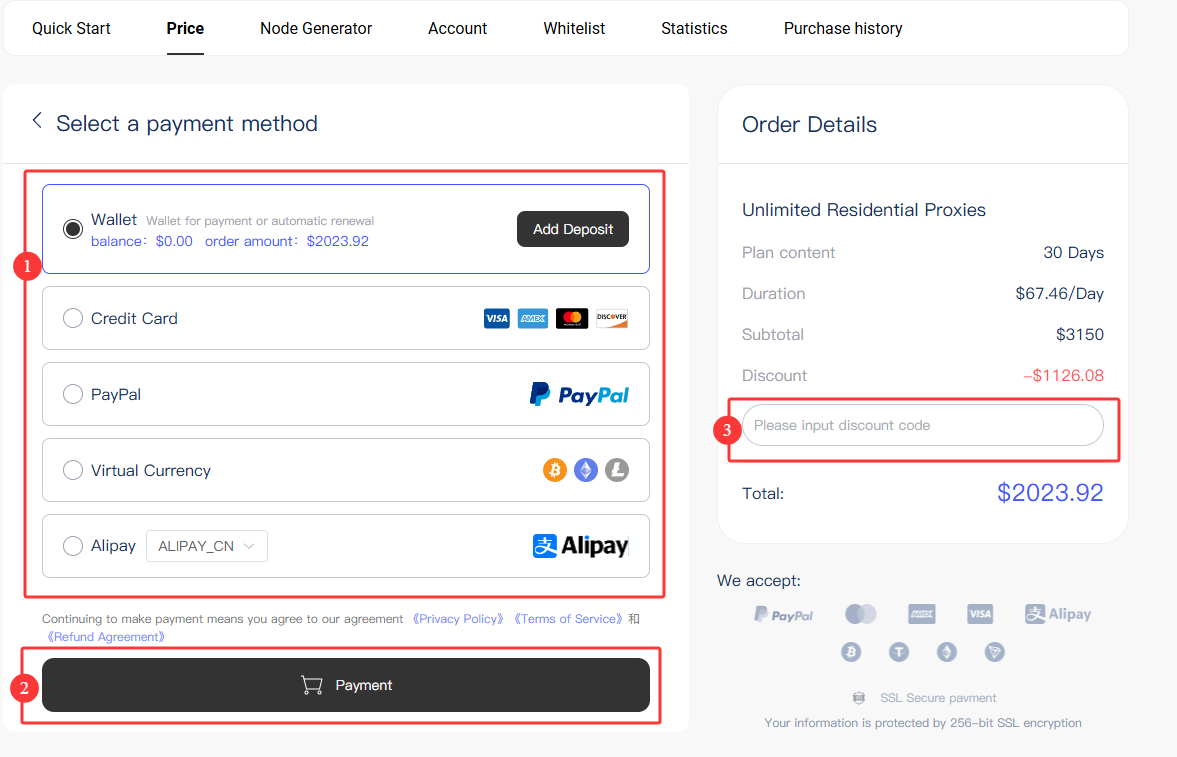
Payment Methods Supported by Blurpath
- Wallet
- Credit Card
- Cryptocurrency
- PayPal
- Alipay
Once you've completed the package purchase, you can start using Blurpath unlimited residential proxies.
Blurpath provides two ways to obtain unlimited residential proxies: username-password
authentication or whitelisted IPs. Below are instructions for both methods.
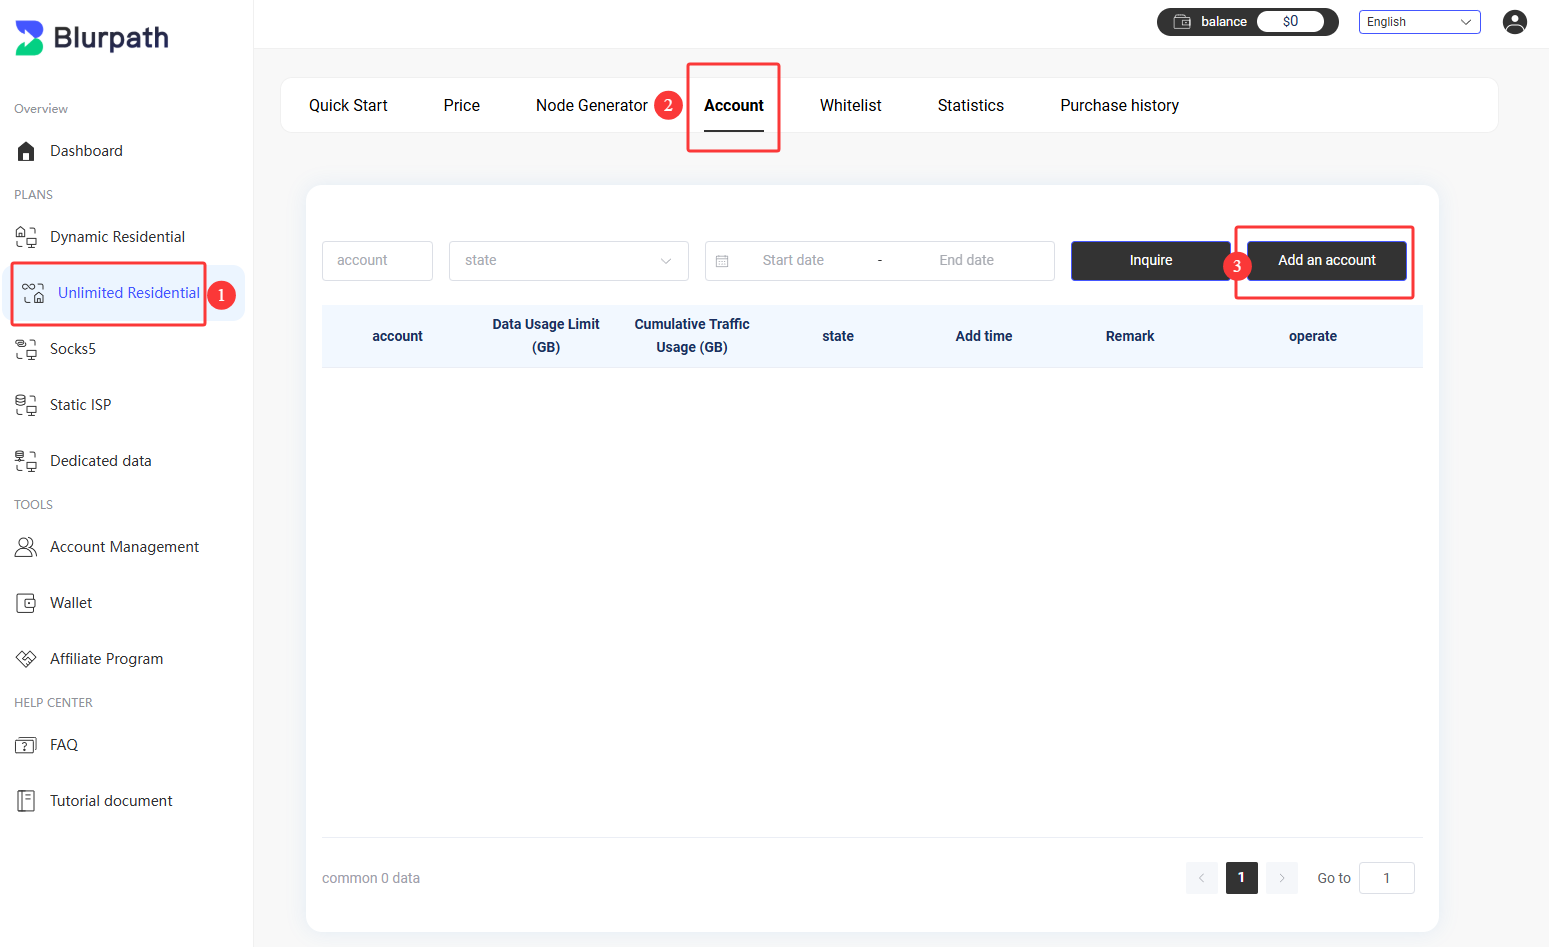
Add an Account:
- Go to the dashboard and select unlimited Residential Proxies
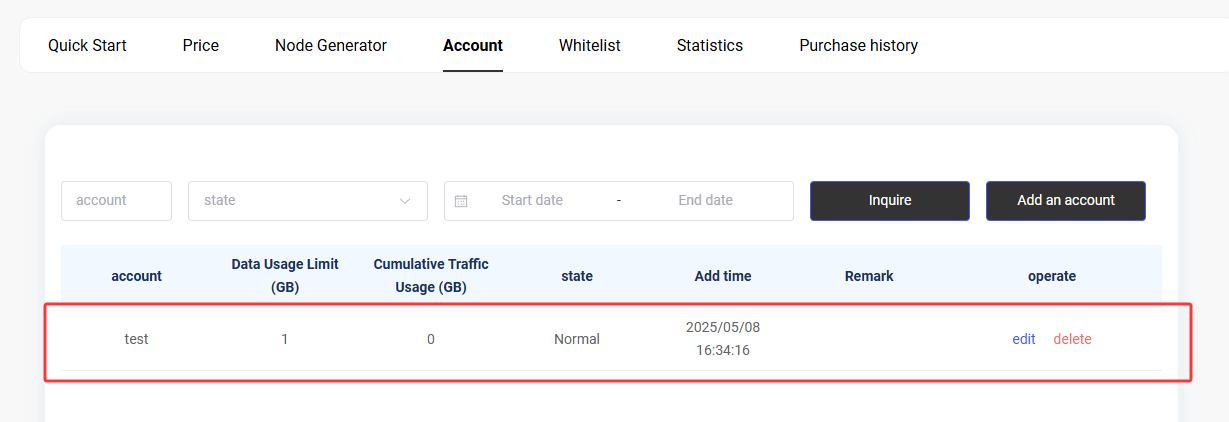
- Click the Account button to enter the account management interface
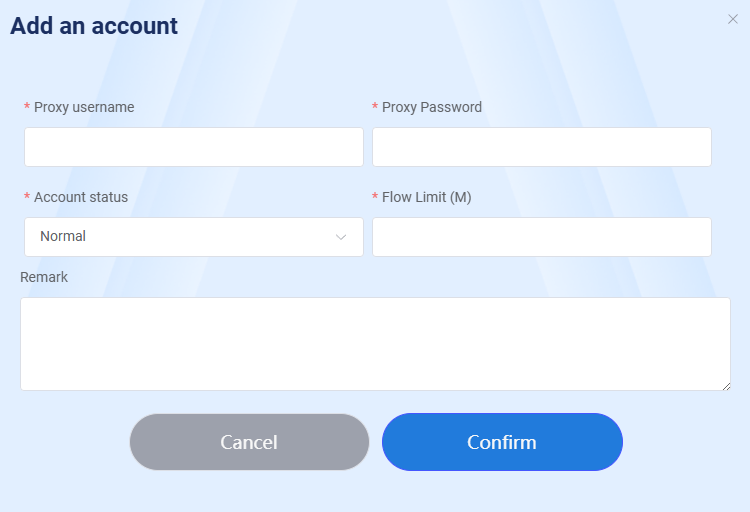
- Click the [Add an account] button on the right to enter the account creation interface.
On the account creation page, input your desired username, password, status, usage limit (in MB), and click
the [Confirm] button to complete the account creation.
After creating the account, select Node Generate from the navigate to the
Account Authentication page.
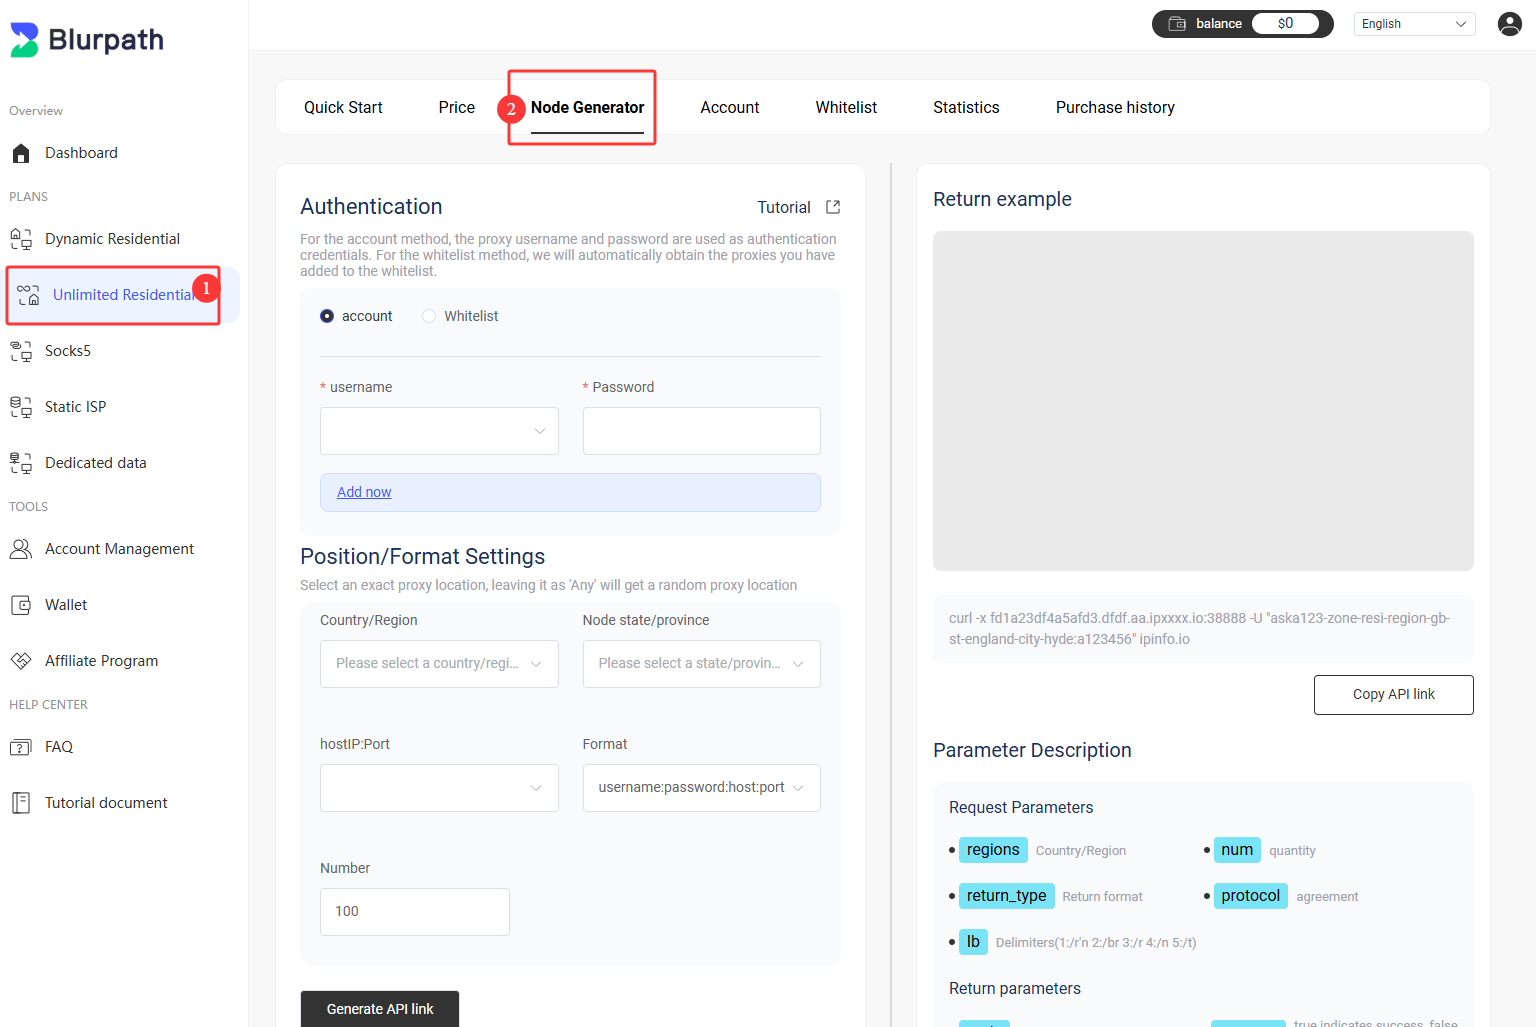
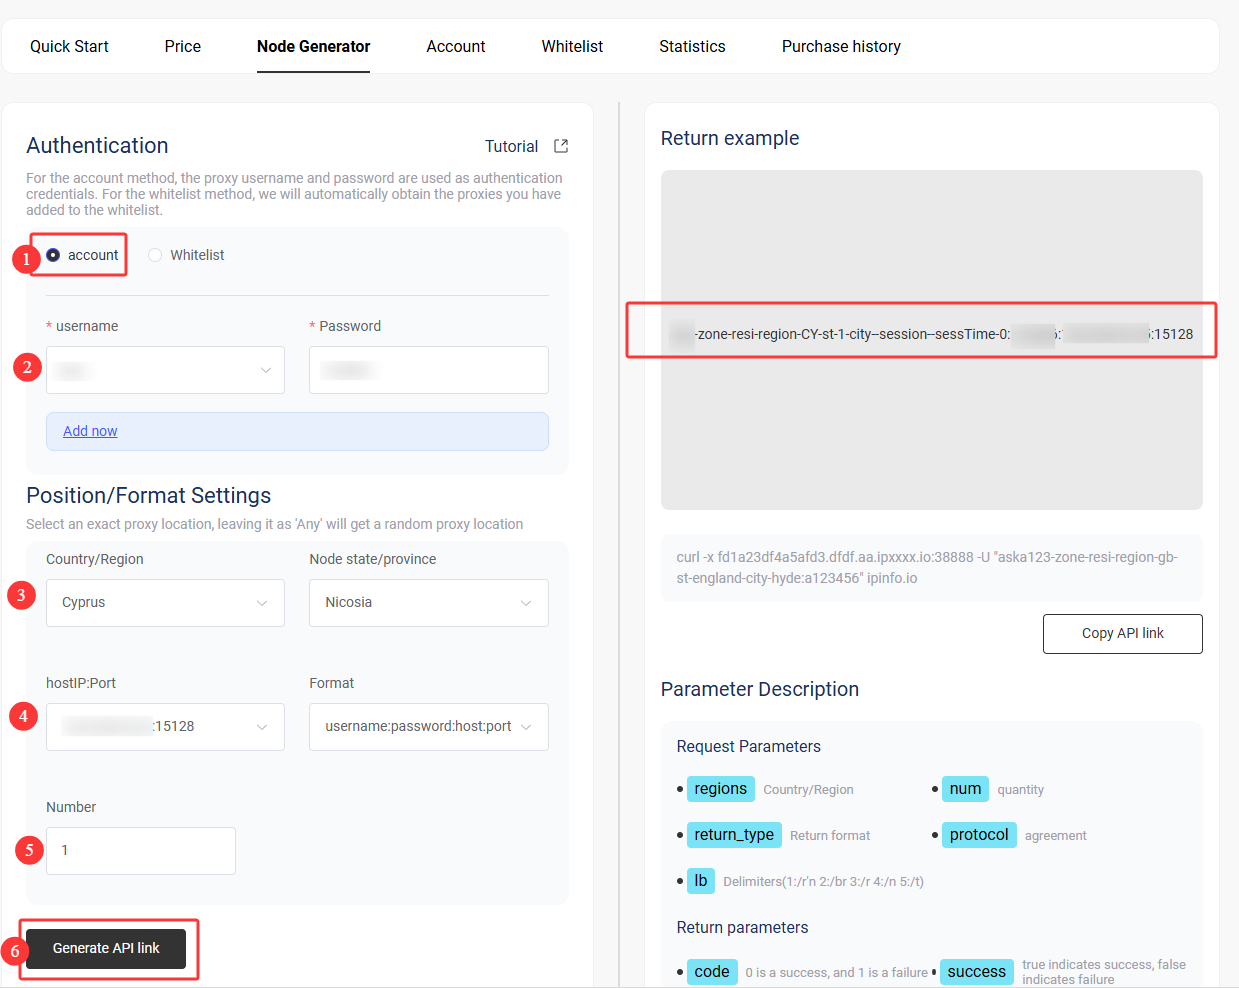
Account Authentication Settings:
- Select account
- Choose the created account
- Select a region
- Choose IP and port number as well as the output format
- Enter the desired quantity
- Finally, click the [Generate API links] button to generate the corresponding API link
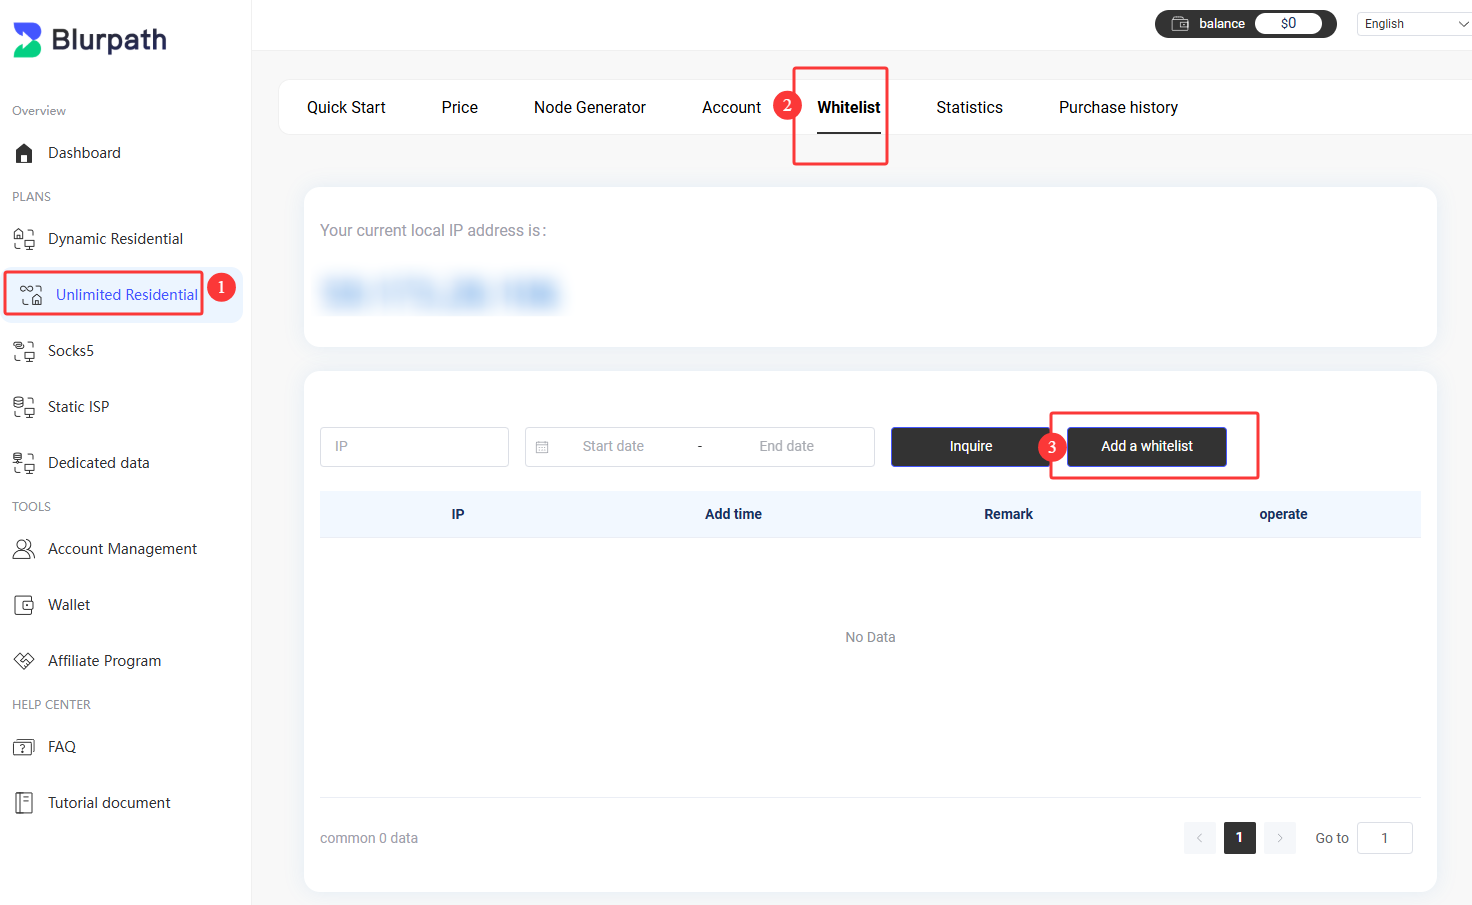
Add an IP Whitelist:
- Go to the dashboard and select Account Management
- Click the Whitelist to enter the IP whitelist management interface
- Click the [Add a whitelist] button on the right to enter the IP whitelist addition interface.
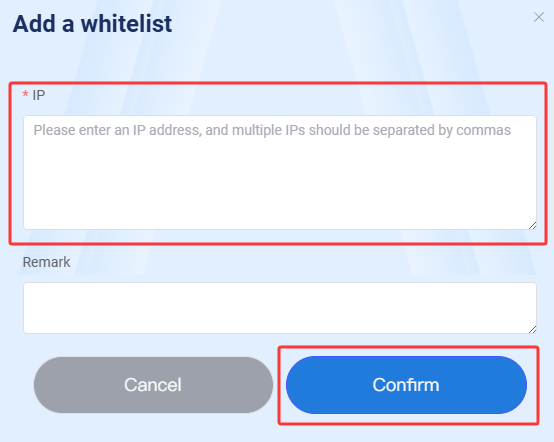
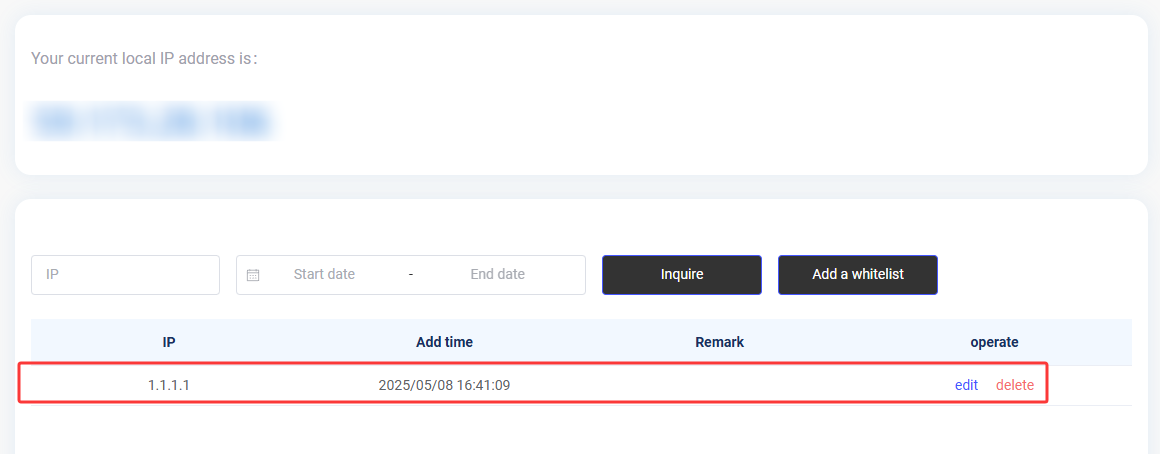
On the IP whitelist addition page, input the specific IP address you want to add, then click the
[Confirm] button to save.
Tips: The added IP address can use unlimited residential proxies
without providing a username and password.
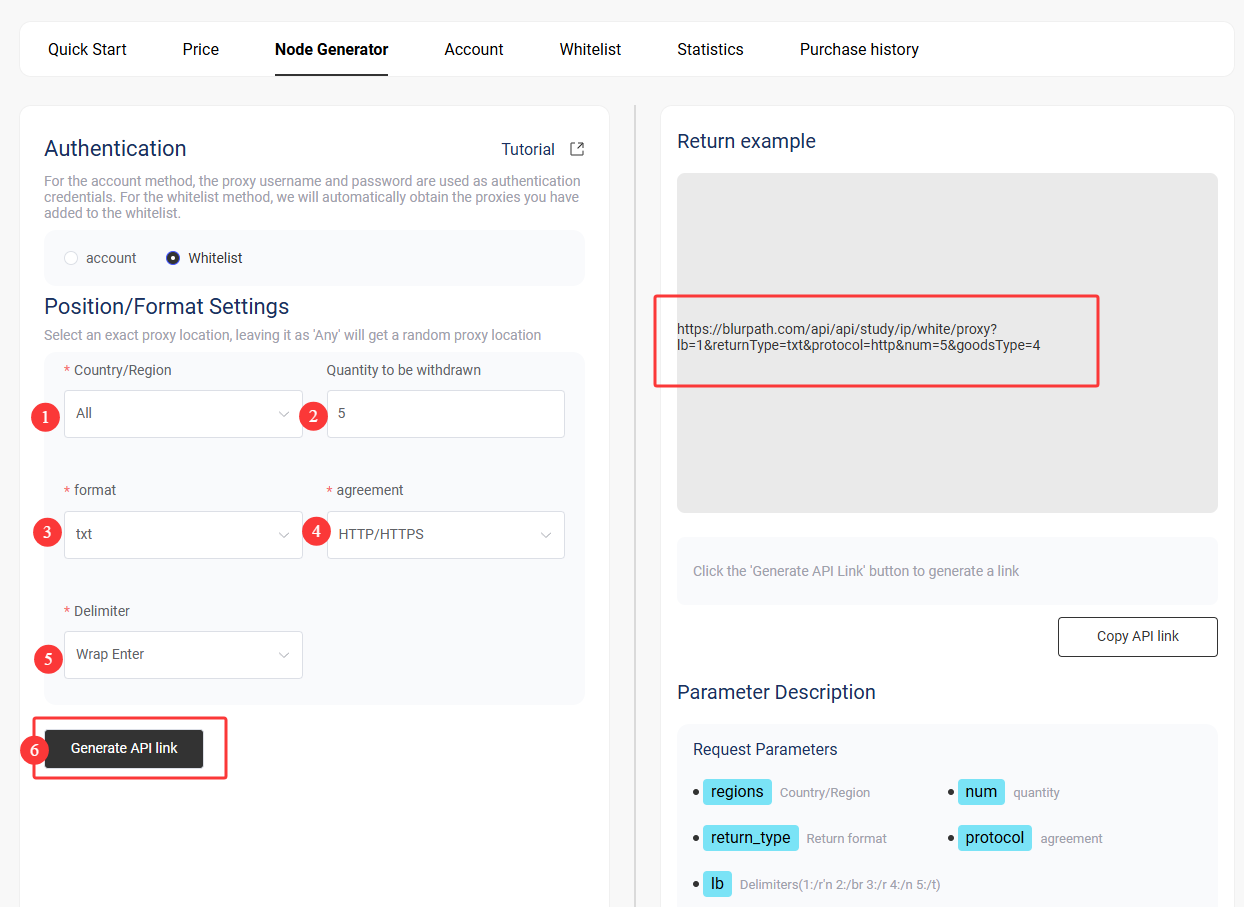
After creating the IP whitelist, select Node Generate from the navigate to the
Account Authentication page, then choose Whitelist.
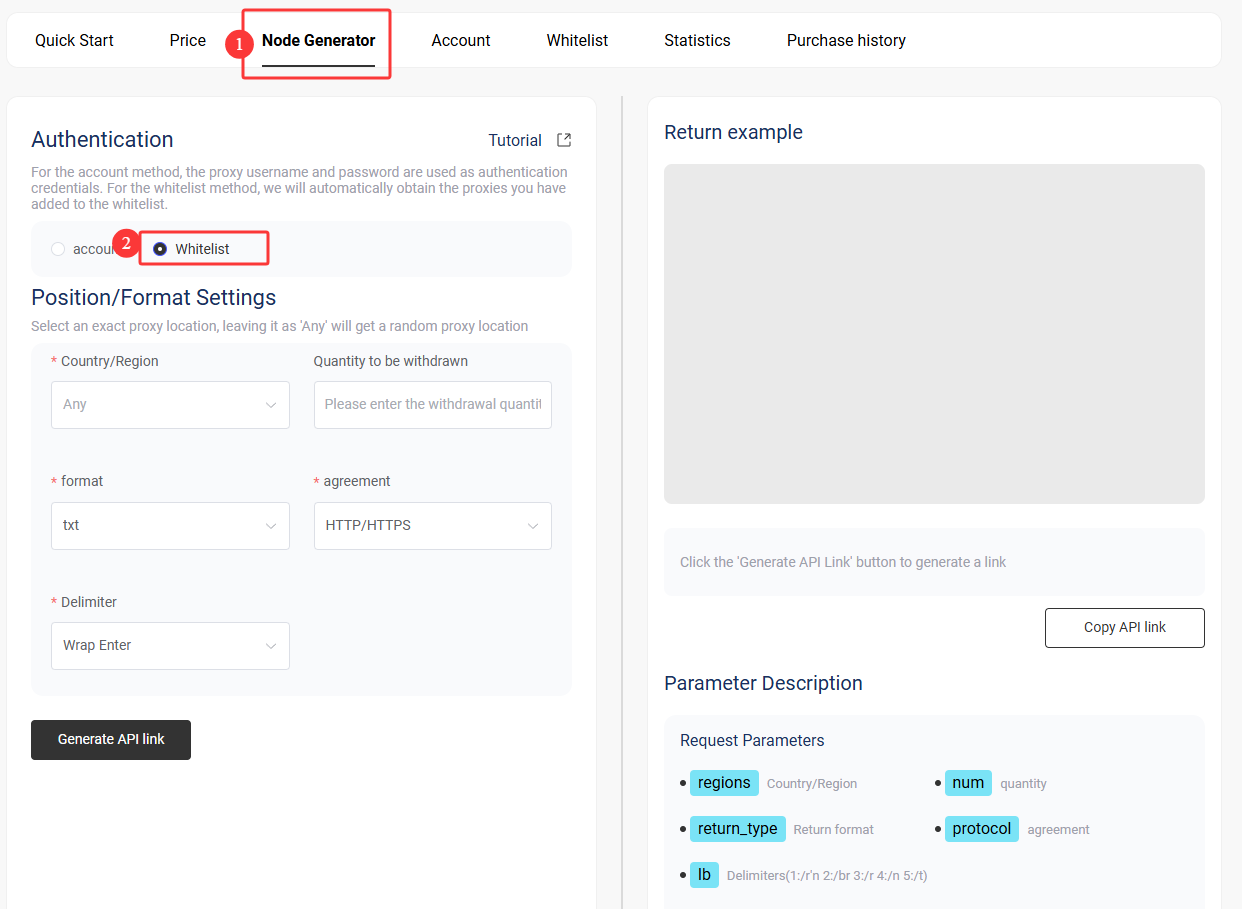
IP Whitelist Settings:
- Select the country/region
- Select the number of APIs to extract
- Select the output format
- Select the proxy protocol: HTTP/HTTPS/SOCKS5
- Select the delimiter
- Finally, click the [Generate API links] button to generate the corresponding API link
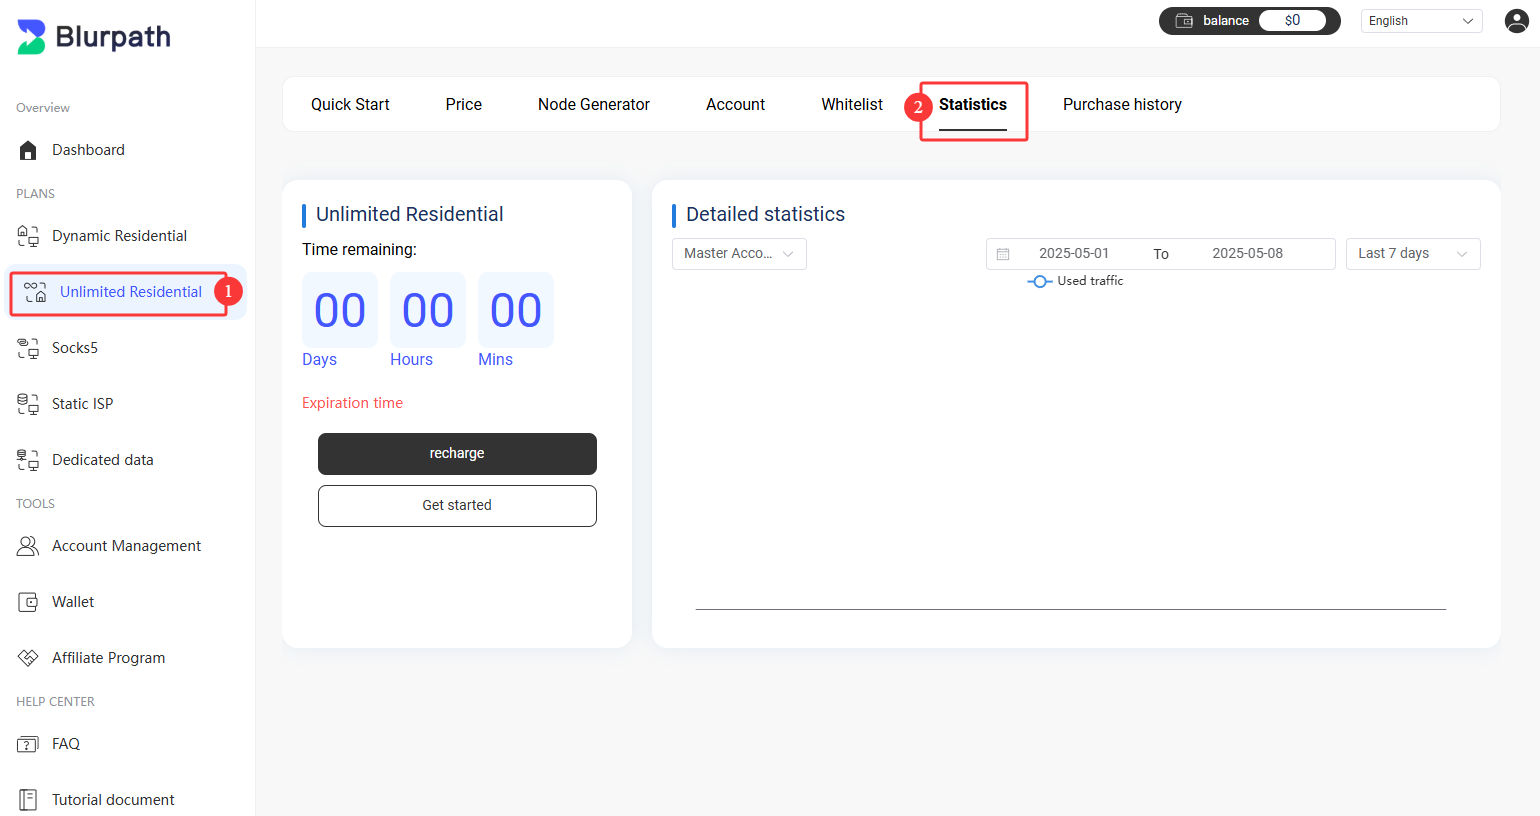
- Go to the dashboard and select Unlimited Residential
- Click the [Statistics] button to enter the statistics details interface
- Here, you can view your remaining traffic and traffic usage.
We've compiled tutorials on integrating Blurpath residential proxies with third-party tools to help you get
started. View
Documentation.
Related Articles
Dynamic Residential Proxies
Quick Start Guide
Quick Start Guide
Dynamic Residential Proxies Quick Start Guide
In this guide, you can learn more about how to use Blurpath dynamic residential proxies.
2025-04-02
Static Residential Proxies
Quick Start Guide
Quick Start Guide
Static Residential Proxies Quick Start Guide
In this guide, you can learn more about how to use Blurpath static residential proxies.
2025-04-02
Datacenter Proxies
Quick Start Guide
Quick Start Guide
Datacenter Proxies Quick Start Guide
In this guide, you can learn more about how to purchase and use Blurpath datacenter proxies.
2025-04-03